Skid Row Text Intro
For this tutorial you will need the following
1. Flash CS4
2. Winuae + AR3 Cart
3. The original SkidRow exe file Find it here
Ripping the font
—————————–
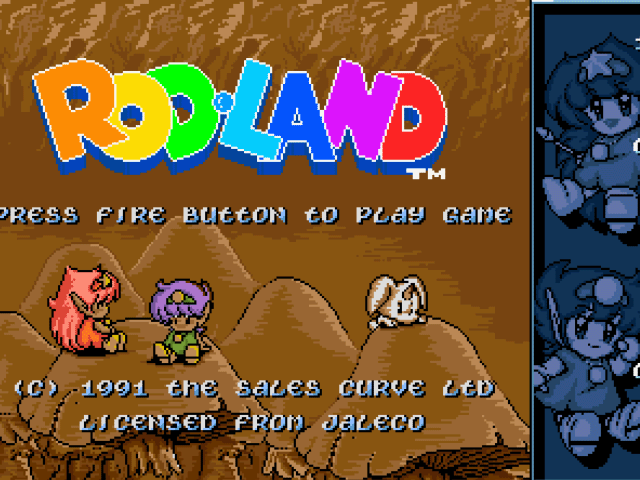
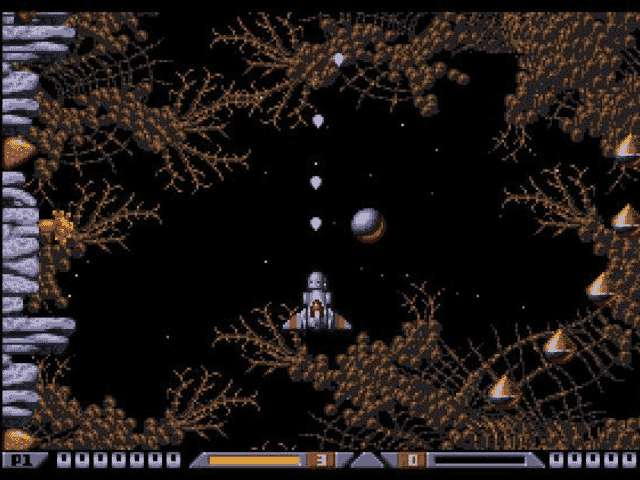
The first thing we need to do is open Winuae and load up the skidrow file.
Once the intro is running you should see this screen

The next thing we want to do is scan the memory for the font used in this intro. To do this we will use Action Replay’s picture search function, pressing P + enter will take you to it.
The first thing you should see is the text from the intro however we don’t want that, so scroll around looking for the original font. Try moving up (by pressing the UP cursor key).
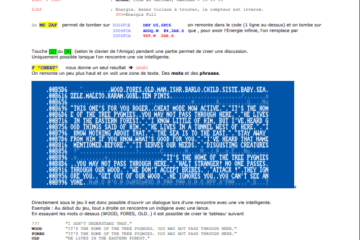
Eventually you will come to the intro code + font and it should look like this

ABCDEFGH…..
This is not really what we want. We want the font to be in ASCII order, what I mean by this is we want the font to be in a specific order that will make it easier for us to use in code.
This is ASCII order. !"#$%&'()*+,-./0123456789 ect……
Why do we need it to be in ASCII order? Because the hex code of this order is as follows: 21 22 23 24 25 26 27 28 29 2a 2b 2c 2d 2e 2f ect…..
So when we use code to read and find that char in our bitmap graphic,for example we can read the char hex code for space, which is hex-20 / dec-32. Then we remove 32 from that value (because that is where the ASCII hex starts) We end up with 0, which is the starting position of our space char in our font. If we want to read # which is hex-23 / dec-35 and after we remove 32 we end up with 3. At this point we multiply that value with the width of the font to get the starting point in our bitmap font for that char.
To make the intro display the font in ASCII we need to hack the text but before we hack the text we need to save the text.
Exit AR picture finder by pressing ESC then we need to find out where the intro code is. We find out where the intro code is by simply pressing D to disassemble the active running code.
We should be around memory area 050000 so take a quick view of this area by typing N 050000. Scroll down a few lines and you will notice the text from the intro appear. Now we need to find the starting point of the text and also the end point, so keep scrolling down to find the ending point

Once you have found the ending point, insert a blank disk and save the part of memory that holds the text data. start:5026e end:504c6

SM txt,5026e 504c6
Done? Next we need to hack the text to display an ASCII friendly font.
Using hex mode we will go to the start of the text at 5026e and change it.
M 5026e
Start typing out hex values starting from 20(space) and ending at 5a(Z)

We need to execute the intro again after you have changed the text into ASCII. We know the intro starts at 50000 so to execute it again we should be able to just G 50000 so let’s try that
G 50000
AR should exit back into the intro and the text should change into our ASCII order

Excellent.
There is no need to worry about the extra ":::::::" these are just there because the original font doesn’t have the chars we requested so it fills in the space with "::::".
Now press print screen and then paste the clipboard into your favourite paint program and cut out that font

We are now done with this part of the tutorial.
Creating the flash file
——————————-
Open flash and a new AS3 file and set the file properties like the image below

Next we want to create a new BITMAPDATA canvas to use as our screen, to do this we go to frame 1 and open the ACTION window and type this.
var myBitmapData:BitmapData = new BitmapData(320,256,false,0x00000000);
var myBitmap:Bitmap = new Bitmap(myBitmapData);
this.addChild(myBitmap);
We just created a bitmap canvas that is 320px wide and 256px in height and with a nice black background (0x00000000)
Then we just added it to the main stage. You can test it by compiling and running the flash file. What you should see is a black screen 320 x 256 😛
Now we need to add the font graphic to the library so we can use it with our code.

FILE > IMPORT > IMPORT TO LIBRARY
Once this file is in your library, right click it and select properties

Click export for action script and give it a name of skidfont. Click ok and close the properties window.
Now we want to tell our code the name of the font file we have just loaded into the library. Return to the action window and add this below our bitmap code
var fontdata:skidfont = new skidfont(0, 0);
Let’s not forget to add our text that we ripped earlier. On the next line of code we put our text but we need to add some things so that flash will recognise it as text
At the start of the text add this
var text="
At the end of the text add this "
var text=" S K I D R O W PROVIDES YOU WITH ANOTHER HOT RELEASE JAGUAR XJ220 ORIGINAL BY MUNCHIE CRACKED BY FFC "
If we are going to be moving our text chars around our bitmap screen we need to create some variables.
var getcharcode=0
//This will hold our charcode
var fwidth=8
//This is the width of every char
var fheight=9
//This is the height of every char
var fontypos=0
//because our font is on 2 rows we need to add this to tell the code where the Get Font Y Pos should point to
var charx=0
// Where the X point should be
var chary=0
//Where the Y point should be
To do everything in 1 frame we need to create a loop
add this to our code
for (var i:uint=0; i<text.length; i++) {
//inside the loop
}
This will perform what we want it to do in 1 go (every letter of our text)
Inside this loop we want to place our copychar code. first we need to get the charcode for every char
add this
getcharcode=text.charCodeAt(i);
//get the ASCII code for the current letter
getcharcode-=32;
//minus 32 from that code (because our first font char starts a 32)
Because our font is on 2 rows we need to tell our code that if it goes past letter G then move down to the next row
add this
if(getcharcode>39){
	fontypos=1 //next row
	getcharcode-=40 //-40 because there is nothing past 40
}
Now we have the char code we want to copy from our font graphic to our bitmap canvas
addthis
myBitmapData.copyPixels(fontdata, new Rectangle(fwidth*getcharcode,fheight*fontypos, fwidth, fheight), new Point(fwidth*charx,fheight*chary));
We are going to copy some pixels from our FONT GRAPHIC to our BITMAPDATA canvas using the copypixel routine .
X pos to read from: fwidth*getcharcode // 8*our char code
Y pos to read from: fheight*fontypos // 9*fontypos (which row? 1 or 2)
Xamount of pixels to copy: fwidth //8 pixels wide
Yamount of pixels to copy: fheight //9 pixels high
////
new point = where on our bitmap canvas to place our rectangle 8*8 char
new X: fwidth*charx //8*charx
new Y: fheight*chary //9*chary
charx will ++ after each char has been copied and chary will ++ when charx reaches the end of our 320 pixel wide screen (charx will also reset at this point)
add this
charx++ //increase newX
if(charx>39){  // if newX gets too far, reset it and increase newY
charx=0
chary++
}

fontypos=0 //reset row pointer
Now run your code and take a look at what you have created. You may notice the Y pos of your text is starting too high. This is easy to correct by adding 40 or 50 pixels to your newY in the copypixels routine.
This is so cool I am so happy I found this page… Nice tutorial.
I think I will try this one.
Cool stuff! I always used myself a program called GraphicSearcher that I stumbled across early -89. I tried that program a while ago and still had all the keyboard shortcuts remembered.. scary 😉 Alas, the program uses DBF-loops for slowing down the key presses so under accelerated Amigas it is getting impossible to use.. I already fixed it to work with 1 or 2 Meg Chip in past…
@mus@shi9: sorry…. I was so tired and got confused. It’s not in AR but in the HRTMon (Hornet Monitor), included in WinUAE (but of course available on the real machine). The ripping technique with the HRT Mon is the same, so I bow down and beg for pardon.
In HRTMon, this tutorial would work as well and then you can use the "cop" command, etc. Just press Page Up to enter the monitor
Great!. How do you run the COP command?
is it C 1?
great tutorial!
I’d suggets you use the "cop" command in AR before the "p" command. The "cop" command will try to locate the active copper lists (if any). The copper list usually holds bitplane pointers, modulos, etc. In the case of ripping a font, a logo or any bitmap graphics, using a cop command can help the AR’s picture ripper to initialize the display parameters properly. Then during the picture ripper you can press the M or N key to increase/decrease the bitmap modulos (bytes to skip at the end of a line before displaying the next one.